

If you spend any time on Pinterest, you have probably seen this pin:

I took my 25%-off-your-entire-purchase coupon to Michael's and bought 4 packages of the mini-cupcake wrappers ($1.99 reg price - 25% = $1.50 each) and 4 packages of standard sized cupcake wrappers from the $1.50 bins next to the checkout (on sale for $1.00 each - 25% off = $.75 each). So now I had the supplies; I just needed to find the time to cut 100 flowers out of cupcake wrappers. Oh how I wished we had a shorter strand of Christmas lights.
It just so happened that my son, Aidan, had to finish his Mission for his 4th grade CA mission report (a requirement for all 4th graders in California). Instead of doing a model from craft store supplies, he decided to make his from Legos. At first the construction was exciting for him, but because it was such a huge project, it had become a daunting task and with it being a beautiful Spring day, it was a challenge for him to stay focused.
I offered to work on the cupcake flower lights along side him while he worked on his Mission. He liked that idea a lot and dumped his extensive collection of Legos all over my bedroom floor while I started cutting flowers and leaves. Once I began assembling the flowers onto the strands, I noticed that my damn lights were twisted every which way! I couldn't manage to keep two consecutive lights in a row facing the same direction. Every other flower was at risk of getting smashed. I realized that when I went to hang the lights I was going to have a heck of a time making many of the flowers visible. Unacceptable!
So in typical Jilliene fashion, I came up with an extravagant solution that was disproportionate to the problem.
"Lets make flowers facing both directions! This way no matter which way the strand twists, a flower is visible. And lets make the flowers more intricate so that even if you get a side view, you will be able to see the pops of color!"

I removed all of the flowers I had already assembled and started all over again. It didn't occur to me until I was an hour into the new design, that this was going to mean 200 flowers - 200 more elaborate flowers. Oh well, I could see from the flowers I had already made, that this was going to be amazing!
It is important to point out that I am adapting a project here, not creating a new one. This alteration does not make the double-sided-more- elaborate-cupcake-wrapper-flower-lights project MY design. I am not the author of this craft. This is Steph Hung's creation at Oh Happy Day. The lights I am showing you here on my blog are my interpretation of her original project. I mention this because far too often artists and crafters tweak something they saw elsewhere and then call it their own. That is plagiarism fair and simple.


- You might want to start with a short strand of lights. 25 seems like a reasonable number..
- Buy extra green small wrappers for the leaves. I ran out. Twice.
- Before you get started, pick the pattern you want to use for your strand. You could go free-style but if you want to avoid having two or three red flowers in a row or groupings of big flowers (big flowers need extra space around their light bulb- side by side- they get crinkled or torn.) you should have some kind of a plan or you'll probably have to back track at some point. I did a pattern of 3 small flowers, 1 big flower, 3 small flowers, 1 big flower, etc. and I tried to alternate colors and styles.
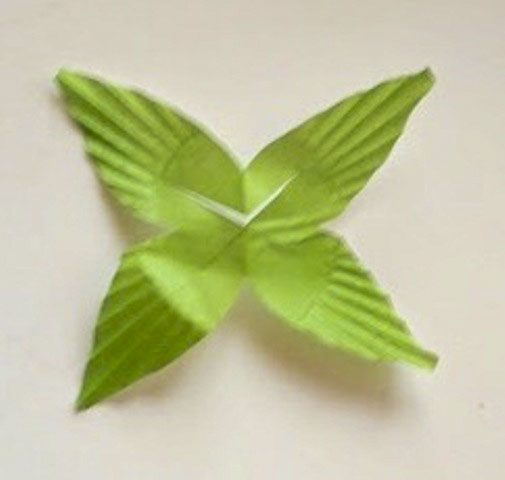
- Cut the X in the center before you cut your flower and leaf shapes. It is just easier.
- Cut multiple leaves and flowers at one time and stock pile them until you have assortments of colors and styles to choose from. When I first started, I cut out one flower and attached it to the strand and then cut out another flower and attached it to the strand. This quickly became tedious. Once I made an assembly line, I had more fun creating the individual designs plus it seemed to go a lot quicker.

- Let's talk about the flowers with a "central bell or corona." The example below consists of a green cupcake wrapper cut into leaves, a big yellow cupcake wrapper cut into a flower shape and a small blue cupcake wrapper in its regular form, only turned inside out. The blue wrapper in the example below is the central bell or corona. This is an adorable feature to use in your strand but it isn't as easy to put together as it seems.
 First of all, turning a cupcake wrapper inside out distorts the shape and the center never returns to a perfect circle. Second, if you opt to make this project with double sided flowers, when you design your bottom flower, you will need to cut slits on the edges of the corona so the cord can run through the middle of it. Third, be very careful of these types of flowers when you set the strand down on a surface so they don't get smashed. All that said, they are totally worth the extra care!
 - If you go with double sided flowers you will assemble your flowers on the light bulb in this order:This is the look you get with a double sided flower. Definitely not a necessity- the lights are adorable as Steph made them. Its just another twist.


- If you are going to make a leaf/ small flower combo, try cutting the small cupcake wrapper down to a smaller flower so you can see the leaves pop out behind the petals.
- After you have finished your strand and you are happy with the final look (i.e.- you are not going to move any of the flowers around), take a little piece of tape and put it around the wire above the top of the flower but below the bulb. This is to prevent the flowers from slipping of the light.
 Those of you who read my blog regularly know that I am not a clean, pristine, flawless artist. A long time ago I tried to walk that road and I was lost before I knew it. I so wanted to be impeccable and detail oriented but it just isn't who I am. I have accepted that my best work comes when I let go of "the" expectation and the most fulfilling work comes when I disregard any kind of audience. I mention this because in comparison to the original design, these flowers up close are sort of a hot mess. They are willy-nilly and lots of silly but collectively, I think the strand is beautiful. The bottom line is that cupcake liner flower lights are awesome and regardless of your style, there is a strand waiting for you!


I was stuck with these. Absolutely amazing!
ReplyDeleteny auto glass
Thank you - they were trickier than that pictorial 4 step tutorial let on. But I had a lot of fun making them! Thanks for stopping by and leaving a comment. I hope to see you again!
DeleteSo cute, what a great idea :)
ReplyDeleteThank you so much! I couldn't resist making them. You know me. If its bright and colorful I'm gonna have to know it some how!
DeleteBrilliant!!! Can't wait to make these for my daughters bedroom!
ReplyDeleteThis is really good for knowledge, thanks for this excellent blog. Please keep sharing.
ReplyDeleteGet in touch if you are looking for 17 inch laptop bag