
Thursday, September 19, 2013
Brief Silence
Just wanted to let you know that I won't be posting this week as my son, Aidan is in the hospital with a bone infection. Hopefully the MRI will show that the infection has not penetrated the bone and they can take him off of IV antibiotics and send him home on Saturday with pills. Please keep him in your prayers.
Sunday, September 15, 2013
CRI-kits and MAR-kits Pens are Super, Duper Fun

is A,B,C's and 1,2,3's. I decided to use my CRI-kit and MAR-kit pens in conjunction with chipboard letters. I wanted to create a sort of "old school" look while playing with the A,B,C motif.
I made a card for my daughter which she *LOVED*! The design was whimsical enough that it gave me an opportunity to use some of my of the products I have been hoarding like baker's twine, 6 x 6" paper pads and notebook style scrapbooking paper.
This was the first time I had used the font from the Cricut cartridge "Designer's Calendar." Instead of cutting out my words, I used the Mar-kits to draw them. Then I went back over the words with a black CRI-kit gel pen to outline each letter.
It took me a minute or two to figure out the nuances of the various font options. The letters vary in proportions and spacing so I used my gypsy to adjust the kerning and sizes to get the look I wanted. To keep the script flowing like handwriting, I welded the letters together.
The interior of the card reads "D is for daughter. I love you my sweet girl... from a to z and back again!"
Click the icon below to purchase a set of CRI-kits and/ or Mar-kits. They are so easy to use and have a spectacular look on Cricut projects!

Thursday, September 12, 2013
20 Unique Ways to Use Vinyl
There are so many ways to use vinyl! Here are 20 unique ideas...
- On the glass inside of a frame.

- On Christmas ornaments.

- On your propane tank.

- On baby wipe cases.

- On mailboxes.

- On clothes hangers.

- On rain boots.
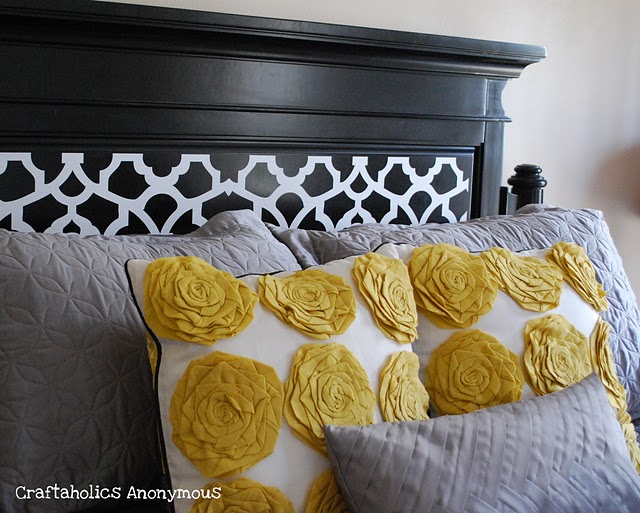
- On your headboard.
- On plastic cones.

- On a fishbowl.

- On a trashcan.

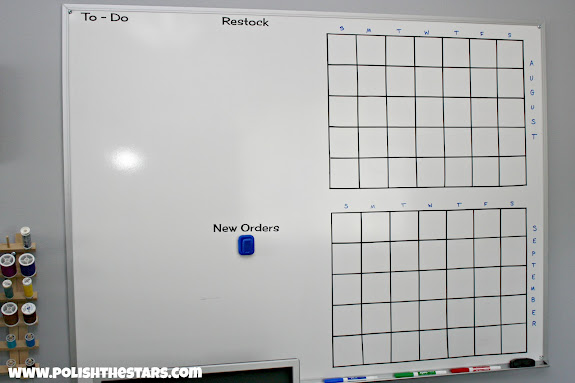
- On a white board.
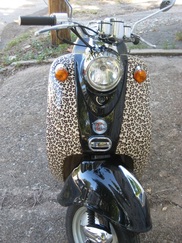
- On a moped.
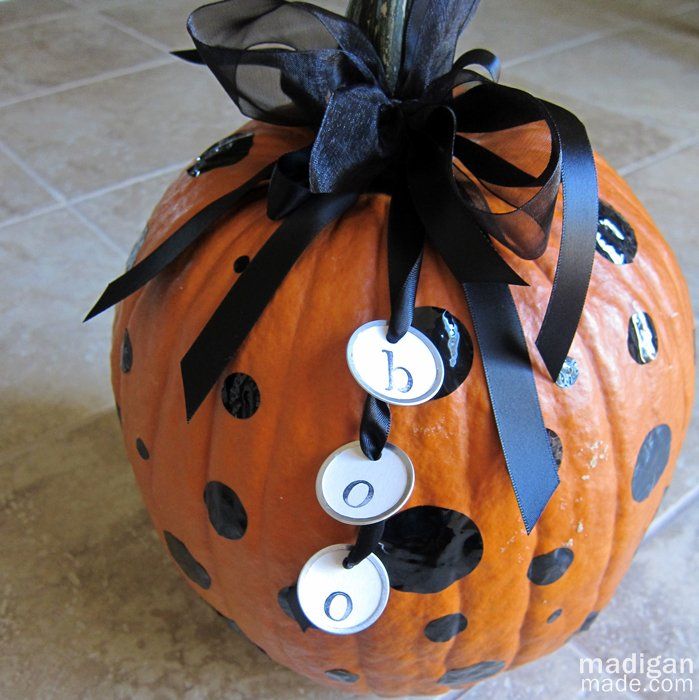
- On pumpkins.
- On a bike helmet.

- On the ceiling fan.

- On the toilet.


- On the washing machine.

- Knobs.

- Binkys.


Monday, September 9, 2013
Decorating Mylar Balloons with Vinyl
Welcome to DAY TWO of Vinyl University and the Fantabulous Cricut Challenge Blog Cricut Crawl (blog hop). Today, here at Jilliene Designing, you are going to learn how to use vinyl on Mylar balloons. It is a VERY easy process and would make a wonderful submission for our Vinyl Challenge!!! Remember, if you post a project using vinyl and one Cricut cut and link it to the Fantabulous Cricut Challenge Blog you will have a chance to win a Cricut Expression and loads of other goodies.
Follow along our Cricut Crawl/Blog Hop and you will have a chance to win 18 more giveaways! You are currently at stop #2 on the rooster so if you missed Robin's Creative Cottage, be sure to pop back before you move on to Heather at Scrapping Runner Creations. Here is our entire blog hop line-up:
Robin http://robinscreativecottage.blogspot.com
YOU ARE HERE -> Jilliene http://jillienedesigns.blogspot.com
Heather http://scrappingrunnercreations.blogspot.com
JoNeita http://createwithjoneita.weebly.com
Jackie http://luv2scrappp.blogspot.com
LB http://www.coolbeansbylb.blogspot.com
Connie http://www.conniecancrop.blogspot.com
Amy T www.craftingwithamy.com
Missy http://www.quickchickdesigns.blogspot.com
Cindy http://www.cindyvernon.blogspot.com
Rebecca craftingmisfit.blogspot.com
Catarina http://blog.docerelashop.com
Kim ogdendoll.blogspot.com
Emily molliemugsblog.blogspot.com
Amy HS http://thestampingtree.blogspot.com
Ro http://rodonner.blogspot.com
Lynn http://mycardsnstuff.blogspot.com
Michelle http://justanutterpapercrafter.blogspot.com

As I mentioned in yesterday's post, last weekend we threw a surprise pirate birthday party for my daughter. We wanted to get the most bang (kaboom) for our buck so I used my Cricut to "Piratize" many of the decorations.
I printed and cut the skull and crossbones below with my Cricut Imagine using the Imagine Cartridge "Buccaneer."

Then I ran the skulls through my Xyron machine and attached them to stapled Dollar Tree foam cowboy hats.

My favorite project was turning a few simple Mylar balloons into a pirate party bouquet! I purchased 9 balloons from Dollar Tree in white, red and black. I used 3, 6x12" vinyl sheets to cut out pirate graphics from the Cricut cartridge "Life's a Party" (vinyl sheets are only $.99 each at Cricket Vinyl Supplies - white, red, brown.)

It was so simple to dress up these balloons - I just couldn't believe it! First I selected the image I wanted to add to the balloon and then I placed the vinyl on my mat.

I squeegeed the vinyl down securely on the mat to prevent air bubbles later on in the process. Next I adjusted the image size so that it would fit appropriately on the balloon and I adjusted my cut settings on my Cricut.
Once cut, I removed the excess vinyl around the image and within the image so that I was left with only the cut I wanted to transfer. I left this image on the mat.
Now I needed to cut my transfer tape to a size large enough to cover the entire vinyl image, but not so large that there was extra tape hanging over the edges that might cause creases and other transfer issues when I went to apply the vinyl to the balloon. To do this I rested the transfer tape above the image so the the edge of the tape sheet sat a little father over than the image edge. I used my scissors to cut the transfer tape from the larger sheet so that there was just a small overhang on the other side as well. That was my horizontal measurement. I repeated the process for the side of the image to get the vertical measurement leaving me with a piece of transfer tape just a tiny bit bigger than the actual image.
TIP: If you do not have transfer tape on hand, you can use Con-Tact Quick Clear Self Adhesive Shelf Liner from the Dollar Tree for $1.00. It actually works great and is much less expensive than official vinyl transfer tape.

To apply the transfer tape to the vinyl, I peeled a small portion of the transfer tape back so I could position it on top of the vinyl, distributing it evenly, and then I gradually eased the tape over the vinyl smoothing out bubbles and wrinkles with a spatula tool as I laid it down. You should smooth over the transfer tape/ vinyl "sandwich" several times to remove as many bubbles as possible and to make sure that the tape is adhered to the entire vinyl cut. This will prevent the vinyl from stretching out of shape or grabbing onto the Mylar before you have it positioned correctly.
TIP: If you do not have a official vinyl transfer tool or Cricut spatula tool you can use a grout/ paint spatula tool from Dollar Tree found in the hardware section next to the paint supplies.
There are two strategies for removing the vinyl from the Cricut mat. The first option is to remove the vinyl from the mat with the backing still on the vinyl. If you have used the 4, 4, 4 settings, the blade should have gone through the backing and you should have no trouble lifting the entire cut. This is ideal when you are putting down a vinyl image that is large like the "Arrrgh" (below) because you can "peel and place", meaning you can peel a little of the backing off at a time, place down a portion of the image and smooth, then peel, etc. This method will allow you to course correct if it starts to lay down wonky and will help prevent distortion and stretching.

The other strategy for lifting the vinyl off your mat is to lift it slowly and carefully so that you leave the backing on the mat (see below).

This method is best when you have delicate images that could easily tear or become distorted. With these, you might want to lay down the vinyl starting from the center, top of the image and gently smooth the transfer tape moving down and outward.
Once you place the vinyl down, gently use your spatula to secure the adhesion. Remember, you are working on a delicate, air filled substrate (that could pop), so don't worry too much about minor stretching or bubbles. Mylar balloons are rounded and have their own creases so most vinyl blemishes will blend in.
Now gently pull off the transfer tape and your balloon is finished!

Follow along our Cricut Crawl/Blog Hop and you will have a chance to win 18 more giveaways! You are currently at stop #2 on the rooster so if you missed Robin's Creative Cottage, be sure to pop back before you move on to Heather at Scrapping Runner Creations. Here is our entire blog hop line-up:
Robin http://robinscreativecottage.blogspot.com
YOU ARE HERE -> Jilliene http://jillienedesigns.blogspot.com
Heather http://scrappingrunnercreations.blogspot.com
JoNeita http://createwithjoneita.weebly.com
Jackie http://luv2scrappp.blogspot.com
LB http://www.coolbeansbylb.blogspot.com
Connie http://www.conniecancrop.blogspot.com
Amy T www.craftingwithamy.com
Missy http://www.quickchickdesigns.blogspot.com
Cindy http://www.cindyvernon.blogspot.com
Rebecca craftingmisfit.blogspot.com
Catarina http://blog.docerelashop.com
Kim ogdendoll.blogspot.com
Emily molliemugsblog.blogspot.com
Amy HS http://thestampingtree.blogspot.com
Ro http://rodonner.blogspot.com
Lynn http://mycardsnstuff.blogspot.com
Michelle http://justanutterpapercrafter.blogspot.com

As I mentioned in yesterday's post, last weekend we threw a surprise pirate birthday party for my daughter. We wanted to get the most bang (kaboom) for our buck so I used my Cricut to "Piratize" many of the decorations.
I printed and cut the skull and crossbones below with my Cricut Imagine using the Imagine Cartridge "Buccaneer."


My favorite project was turning a few simple Mylar balloons into a pirate party bouquet! I purchased 9 balloons from Dollar Tree in white, red and black. I used 3, 6x12" vinyl sheets to cut out pirate graphics from the Cricut cartridge "Life's a Party" (vinyl sheets are only $.99 each at Cricket Vinyl Supplies - white, red, brown.)

It was so simple to dress up these balloons - I just couldn't believe it! First I selected the image I wanted to add to the balloon and then I placed the vinyl on my mat.

I squeegeed the vinyl down securely on the mat to prevent air bubbles later on in the process. Next I adjusted the image size so that it would fit appropriately on the balloon and I adjusted my cut settings on my Cricut.
Vinyl cut settings: blade depth-4, speed-4 and pressure-4
Once cut, I removed the excess vinyl around the image and within the image so that I was left with only the cut I wanted to transfer. I left this image on the mat.
Now I needed to cut my transfer tape to a size large enough to cover the entire vinyl image, but not so large that there was extra tape hanging over the edges that might cause creases and other transfer issues when I went to apply the vinyl to the balloon. To do this I rested the transfer tape above the image so the the edge of the tape sheet sat a little father over than the image edge. I used my scissors to cut the transfer tape from the larger sheet so that there was just a small overhang on the other side as well. That was my horizontal measurement. I repeated the process for the side of the image to get the vertical measurement leaving me with a piece of transfer tape just a tiny bit bigger than the actual image.
TIP: If you do not have transfer tape on hand, you can use Con-Tact Quick Clear Self Adhesive Shelf Liner from the Dollar Tree for $1.00. It actually works great and is much less expensive than official vinyl transfer tape.

To apply the transfer tape to the vinyl, I peeled a small portion of the transfer tape back so I could position it on top of the vinyl, distributing it evenly, and then I gradually eased the tape over the vinyl smoothing out bubbles and wrinkles with a spatula tool as I laid it down. You should smooth over the transfer tape/ vinyl "sandwich" several times to remove as many bubbles as possible and to make sure that the tape is adhered to the entire vinyl cut. This will prevent the vinyl from stretching out of shape or grabbing onto the Mylar before you have it positioned correctly.
TIP: If you do not have a official vinyl transfer tool or Cricut spatula tool you can use a grout/ paint spatula tool from Dollar Tree found in the hardware section next to the paint supplies.
There are two strategies for removing the vinyl from the Cricut mat. The first option is to remove the vinyl from the mat with the backing still on the vinyl. If you have used the 4, 4, 4 settings, the blade should have gone through the backing and you should have no trouble lifting the entire cut. This is ideal when you are putting down a vinyl image that is large like the "Arrrgh" (below) because you can "peel and place", meaning you can peel a little of the backing off at a time, place down a portion of the image and smooth, then peel, etc. This method will allow you to course correct if it starts to lay down wonky and will help prevent distortion and stretching.


This method is best when you have delicate images that could easily tear or become distorted. With these, you might want to lay down the vinyl starting from the center, top of the image and gently smooth the transfer tape moving down and outward.
Once you place the vinyl down, gently use your spatula to secure the adhesion. Remember, you are working on a delicate, air filled substrate (that could pop), so don't worry too much about minor stretching or bubbles. Mylar balloons are rounded and have their own creases so most vinyl blemishes will blend in.
Now gently pull off the transfer tape and your balloon is finished!

Vinyl University and FCCB Cricut Crawl
Welcome to the Fantabulous Cricut Challenge Blog's "Cricut Crawl" (a Cricuty version of a blog hop), day one of "Vinyl University" sponsored by Cricket Vinyl Supplies, and if you are new to Jilliene Designing, welcome to my blog!
This week FCCB is challenging you to create a Cricut project using vinyl. You can purchase vinyl for your project at Cricket Vinyl Supplies using the coupon code: fantabulous for a 15% discount!
Prizes, prizes, prizes... If 100 crafters submit a project for this week's Fantabulous Cricut Challenge Blog's challenge, Cricket Vinyl Supplies will give away a Cricut Expression package that includes:

But wait! There's more! There will be Blog Candy (Prizes) at every one of the stops along the Cricut Crawl which means you have 18 opportunities to win crafty goodness. And there will be a Grand Prize up for grabs at FCCB for one of the participants who submits a project using vinyl. That's a lot treasure to collect on your Cricut Crawl adventure.

Speaking of treasure, yesterday we threw my daughter a surprise pirate birthday party and there were eye patches, swords and hidden treasure for everyone.

I bought red, black and white balloons from the Dollar Tree and customized them using the Cricut cartridge "Life's a Party" and some of the fabulous vinyl sent to us by Cricket Vinyl Supplies. (I point out that the vinyl they sent was "fabulous" because not all vinyl is created equally. I learned this the hard way which I will share with you later this week.)

These balloons took me less than an hour and were so easy to make. Stop by my blog tomorrow for step by step instructions on how to use Vinyl and any Cricut image to decorate balloons.

Now let's talk about the prize I will giveaway next Sunday, 7PM PST. I just love the tools created by We R Memory Keepers and the Sew Ribbon is my new favorite. I just purchased mine last Spring and now it seems like I incorporate ribbon sewing in almost all of my projects. My absolute favorite design is the scalloped so I am giving away a Scallop kit, extra ribbon needles and some gorgeous red ribbon.

To enter for your chance to win:
Your next stop is with heather at Scrapping Runner Creations. Make sure to visit all the stops along the way and when you get done, make sure you link up your project to FCCB's Fantabulous Cricut Crawl post!!
Here is the line up in case you get lost :
Robin http://robinscreativecottage.blogspot.com
YOU ARE HERE -> Jilliene http://jillienedesigns.blogspot.com
Heather http://scrappingrunnercreations.blogspot.com
JoNeita http://createwithjoneita.weebly.com
Jackie http://luv2scrappp.blogspot.com
LB http://www.coolbeansbylb.blogspot.com
Connie http://www.conniecancrop.blogspot.com
Amy T www.craftingwithamy.com
Missy http://www.quickchickdesigns.blogspot.com
Cindy http://www.cindyvernon.blogspot.com
Rebecca craftingmisfit.blogspot.com
Catarina http://blog.docerelashop.com
Kim ogdendoll.blogspot.com
Emily molliemugsblog.blogspot.com
Amy HS http://thestampingtree.blogspot.com
Ro http://rodonner.blogspot.com
Lynn http://mycardsnstuff.blogspot.com
Michelle http://justanutterpapercrafter.blogspot.com
Prizes, prizes, prizes... If 100 crafters submit a project for this week's Fantabulous Cricut Challenge Blog's challenge, Cricket Vinyl Supplies will give away a Cricut Expression package that includes:
- a Cricut Expression machine
- deep cut blade
- Jasmine Cricut cartridge
- ten 12” x 12” assorted sheets of matte vinyl
- one 12” x 12” gridded transfer tape.
But wait! There's more! There will be Blog Candy (Prizes) at every one of the stops along the Cricut Crawl which means you have 18 opportunities to win crafty goodness. And there will be a Grand Prize up for grabs at FCCB for one of the participants who submits a project using vinyl. That's a lot treasure to collect on your Cricut Crawl adventure.


This is how I used vinyl and my Cricut to add to the pirate party decor.

I bought red, black and white balloons from the Dollar Tree and customized them using the Cricut cartridge "Life's a Party" and some of the fabulous vinyl sent to us by Cricket Vinyl Supplies. (I point out that the vinyl they sent was "fabulous" because not all vinyl is created equally. I learned this the hard way which I will share with you later this week.)

These balloons took me less than an hour and were so easy to make. Stop by my blog tomorrow for step by step instructions on how to use Vinyl and any Cricut image to decorate balloons.

Now let's talk about the prize I will giveaway next Sunday, 7PM PST. I just love the tools created by We R Memory Keepers and the Sew Ribbon is my new favorite. I just purchased mine last Spring and now it seems like I incorporate ribbon sewing in almost all of my projects. My absolute favorite design is the scalloped so I am giving away a Scallop kit, extra ribbon needles and some gorgeous red ribbon.

To enter for your chance to win:
- Follow my blog by clicking the button "Join this Site" on the upper right and signing up.
- "Like" Jilliene Designing on Facebook by clicking HERE.
- Leave a comment below letting me know that you did both #1 and #2, plus introduce yourself and tell us if you have played with vinyl before.
Your next stop is with heather at Scrapping Runner Creations. Make sure to visit all the stops along the way and when you get done, make sure you link up your project to FCCB's Fantabulous Cricut Crawl post!!
Here is the line up in case you get lost :
Robin http://robinscreativecottage.blogspot.com
YOU ARE HERE -> Jilliene http://jillienedesigns.blogspot.com
Heather http://scrappingrunnercreations.blogspot.com
JoNeita http://createwithjoneita.weebly.com
Jackie http://luv2scrappp.blogspot.com
LB http://www.coolbeansbylb.blogspot.com
Connie http://www.conniecancrop.blogspot.com
Amy T www.craftingwithamy.com
Missy http://www.quickchickdesigns.blogspot.com
Cindy http://www.cindyvernon.blogspot.com
Rebecca craftingmisfit.blogspot.com
Catarina http://blog.docerelashop.com
Kim ogdendoll.blogspot.com
Emily molliemugsblog.blogspot.com
Amy HS http://thestampingtree.blogspot.com
Ro http://rodonner.blogspot.com
Lynn http://mycardsnstuff.blogspot.com
Michelle http://justanutterpapercrafter.blogspot.com
Subscribe to:
Posts (Atom)