Sunday, March 31, 2013

Happy Easter!


Happy Easter everyone.  I hope you had a lovely day with the people you love (or on your own). We sent our kids to my sister's with grandma to do the whole Easter bunny shebang while we worked in the garden.  I guess I bah-hum-'bugged out' this Easter because it came so early this year.  I forgot to pull out my Easter decorations and the kids didn't even dye their Easter eggs until last night.


My husband is in charge of coloring eggs with the kids because I have an irrational aversion to eggs. I got sick from a bad egg when I was little and still to this day, they horrify me.  I spoke to a therapist about it once and he said it wasn't all that unusual but most people who know me well, enjoy shining a light on this neurotic idiosyncrasy in my personality.

Because of my hatred for unfertilized chicken spawn, Easter is the one and only time we have eggs in the house.  The kids are only allowed to eat them outside and they must wash their hands and brush their teeth before getting near me.  I share all of this detail with you to explain why our Easter eggs are not more esthetically pleasing.  I don't want you to think that my creative abilities stop at white round objects.

It rained last night so my 10 year old son left this on the back door of our house:
Instead of hiding eggs, we hid otter pops.  The Easter bunny brought a tupperware basket of treats but they were a little unconventional.  Chocolate milk mix, animal crackers and wooden bird houses filled their baskets.  Also acrylic paint, markers, an assortment of paint brushes and a "decorate a mug" kit. The kids were thrilled!  So that was Easter at the Isaacs' house. Quiet but quirky- now we will all be home for the next 7 days.  I'm praying for happy days.

Saturday, March 30, 2013

Storing My Children's Artwork

Follow my blog with Bloglovin

I'm not a hoarder (well, except with crafting supplies) but I am quite sentimental so I have been holding on to my children's best artwork and homework as long as they have been in school.  I have one of those gargantuan under-the-bed storage tubs that has been full for over a year now, so I've been putting their latest colorful and creative creations in a laundry basket.
 

Yesterday, the sun and the moon aligned and I decided to archive their work into their own art books.  I had recently picked up 6 extra large binders used to show invitation samples to brides and other party throwers, for just $2.00 each, Thinking they would be perfect for showcasing my 7 and 10 year old's work, I had been storing them on a shelf in my studio.


It took a while to separate their work and put all of it in chronological order, but this allowed me the opportunity to weed out projects that were too thick or large.


Once I had my final stacks for each kid I pulled out the rubber cement and started adhering.  Being the devout scrapbooker that I am, I tried to arrange their work with some sort of cohesiveness also keeping esthetics in mind.  It took some time, but it was truly a labor of love to be able to reflect on their wonderful lives and growth as humans over the years.  I felt so proud to be their mommy.


When I presented the kids with their books the next day they were so touched and excited!  They both gave me big bear hugs and told me they loved me.  Then they sat down and savored each and every page.  Every couple of minutes one of them would say "look daddy, I made this" or would read something they wrote aloud.  I felt like I had given them so much more than their history.  It seemed as though I gave them a tall glass of self esteem which is the greatest joy I can experience as a parent.

Art is a marvelous medium for living.  It communicates as much to the artist as it does to the viewer.  I defines feelings and history and joy and it says "I was here and I did something special".  No amount of laundry or grocery shopping or mowing the lawn can match that.  A reminder all of us artists - each and every human, should consider the next time they feel their creativity peaking.

Thursday, March 28, 2013

DIY Washi Tape Dispenser

As I mentioned in my last post, the WRMK Washi Tape Dispenser sold out on HSN before I was able to snatch one up. This, of course, made me obsessed with getting a dispensor elsewhere. I can't explain why this happens to me, but when I get something in my craw (what is a craw anyway?), I can't seem to let it go. So I scoured the internet for an adequate, yet cost effective substitute...

I found a lot of neat inventions on Pinterest...

...and some really cool products on Etsy, 
 
...but nothing that set my hair on fire.  

I had a super simple idea, but I assumed that if I hadn't come across it during my research, then it probably had been tried and the idea was a dud.  I gave it a try any how and guess what? It worked! 


Here are instructions on how to make a super simple washi tape dispenser.

1. Find an empty aluminum foil, wax paper or plastic wrap box.  Try to use a box that has a serrated edge on the bottom just like a scotch tape dispenser otherwise ripping the tape off may be awkward.


2. Remove the tube inside and slide a roll of tape on it to make sure it fits. It is OK if the roll of tape is loose on the tube but keep in mind that the looser it is, the less tension you'll have on the individual rolls of washi tape.


3. Place packing tape on the front lower half so when you extend the tape tail from the roll and set it on the box edge, you can easily lift it off the box without the washi sticking to the box paper.
 
4. Now reinforce the box with packing tape or go wild and collage with washi tape. This will make the box more durable and if you use washi tape you will have quick reference as to which tape is the box.

My box was on the smaller side so I could not put rolls all the way to the edges. If your box is too small for some of your washi rolls, start using more plastic wrap so you have another box to work with.

Since writing this original post, I have come upon an upcycle for single rolls of Washi tape.  You can find  the tutorial here.

Tuesday, March 26, 2013

DONE!!!

I cannot begin to tell you how amazing it feels to have finished several year's worth of client work.  Without going into too many details (because this project is in my rear view mirror), I handed off 15 photo binder boxes filled with 4000+ photos that were sorted, numbered, digitized and entered into a master database.  


I had been working on this project for 3 years and the last few months have been all-consuming. I had such anxiety about getting the project completed that I stopped doing almost all things crafty.  No shopping, no blog, no 2peas - I just wanted it done!  And today my friends, it is.


In addition to being super excited about finishing my project, I am also giddy about a few purchases I made from HSN's 24 hour craft event yesterday.  I recorded all the shows and then whenever I took breaks from working, I'd skim through the presentations.  I was so bummed that I missed the WRMK Washi Tape Bundle which sold out before I had a chance to watch that episode!
I did however, pick up a nice stash of other treats and am anxiously awaiting their delivery. I love that feeling!  Isn't it the best?


This "Life's Little Moments" Chipboard Kit was configured by Lisa Bearnson whom I love!  It was a treat to hear her enthusiastic descriptions of so many cool products.  "I'm so glad your back Lisa!" This photo (above) doesn't really reveal the coolness of this kit, but if you watch the video on their site, you will see all of the great goodies included.

I also picked up this scrumptious treasure. This is the Gabbie Designer Collection by Anna Griffin.  I am not usually drawn to Anna Griffin products - they just don't suit my particular style, but I was delighted to discover this new line.  It is so colorful and fun -just jam packed with possibilities.


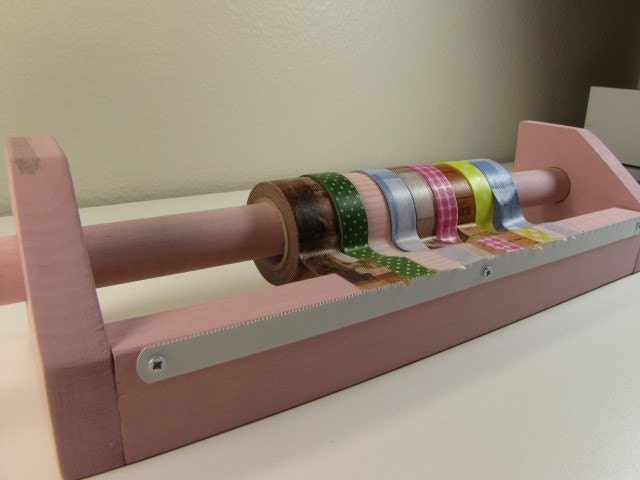
Despite missing the WRMK tape bundle, I did manage to pick up this darling 12 pack of washi.  The colors and patterns are totally whimsical and I love each and every style! Yum-Yum-Yummy!

The last show of the night had a surprisingly cool product.  One I would have normally skimmed through but I watched this segment live.  What luck, because I cannot wait to get my hands on this amazing little photo printer.
This Canon Selphy Compact Photo Printer is a dream come true!  It is wireless which means you can print directly from your phone!  It prints vibrant 4" x 6" photos and it laminates them which means no finger prints!  You can create photo collages right from the printer!  And the very best part is that each photo only costs $.25!  How did I come up with that number you ask?  Well I bought an Ink/ Paper set from Amazon for $27 that will print 108 photos which equals... yes one quarter per pic. SOLD!  I say Woo Hoo for this amazing product!  

What made all of this even more delightful was that I didn't have to fork out a dime because of my HSN card and easy pay.  If there was ever a time when I needed a 1, 2, 3 punch of crafty goodness it was now.  And what a great way to kick off a new season of creativity!  I am back and here is where I plan to stay.  {Sigh.}  {Smile.}  I do not know if I have ever been so jazzed to color, cut and glue!

Sunday, March 24, 2013

2 Days, 48 hours, 2880 minutes...

In exactly 2 days I will be FREE!  I have been enslaved to a number of client and school projects that have prevented me from immersing  myself into my world of creativity.

My right brain has been in solitary confinement for months, but I'm about to be sprung and I just can't wait.  I have a list of things I want to do and a pile of inspiration and materials I want to use!

Just two days and I will have purged my life of about 150 lbs and 50% of closet space filled with left brain thinking.  Until then, however, I must focus and deliver.  No goofing around nor daydreaming about what will soon come.  I need to dot my "i"s and cross my "t"s.  In no way, shape or form, should my desire to break free from this project be apparent in my work. Just 2 more days...

I'll see you then.